
Views: 222 Author: Ella Publish Time: 2025-05-26 Origin: Site


Content Menu
● Why Is Sharpening Your Vegetable Knife Important?
● Essential Tools for Sharpening
● Understanding Sharpening Stones and Grits
● Mastering the Sharpening Angle
● Step-by-Step Sharpening Process
>> Step 1: Sharpen the First Side
>> Step 2: Sharpen the Opposite Side
>> Step 3: Refine the Edge on Fine Grit
>> Step 4: Remove Burr and Polish
● Detailed Sharpening Techniques and Tips
>> Sharpening the Tip and Base
>> Maintaining a Consistent Angle
● Advanced Sharpening Concepts
● Caring for Your Vegetable Knife After Sharpening
● Sharpening Serrated Vegetable Knives
● FAQ
>> 1. How often should I sharpen my vegetable knife?
>> 2. Can I use an electric sharpener on my vegetable knife?
>> 3. What is the difference between honing and sharpening?
>> 4. How do I know if my knife has a burr?
>> 5. Can I sharpen serrated vegetable knives at home?
Sharpening a vegetable knife is a fundamental skill that every home cook and professional chef should master. A sharp vegetable knife not only enhances your cutting precision and efficiency but also ensures safety in the kitchen by reducing the risk of slips and accidents. This detailed guide will walk you through the entire process of sharpening your vegetable knife, from selecting the right tools to mastering the technique, and maintaining your knife's edge for long-lasting performance.

A dull knife is more dangerous than a sharp one. When a blade loses its edge, it requires more force to cut through vegetables, increasing the chance of the knife slipping and causing injury. Additionally, a sharp knife preserves the texture and flavor of vegetables by making clean cuts rather than crushing or tearing them. Regular sharpening keeps your knife performing at its best and extends its lifespan.
Before starting, gather the necessary tools:
- Whetstone (Sharpening Stone): The preferred tool for sharpening, available in various grit sizes.
- Honing Rod (Steel): Used for realigning the blade edge between sharpenings.
- Sharpening Guide or Angle Guide: Helps maintain a consistent sharpening angle.
- Leather Strop: For polishing the blade and removing micro-burrs.
- Water or Honing Oil: Lubricates the whetstone during sharpening.
Sharpening stones come in different grit levels, each serving a specific purpose:
Grit Level | Purpose |
Coarse (<1000 grit) | Reshapes damaged or very dull blades |
Medium (1000-3000) | Regular sharpening for dull knives |
Fine (3000-6000) | Polishing and refining the edge |
Extra Fine (6000+) | Final polishing for razor-sharp finish |
For vegetable knives, a medium grit stone is ideal for routine sharpening, followed by a fine grit stone to polish the edge.
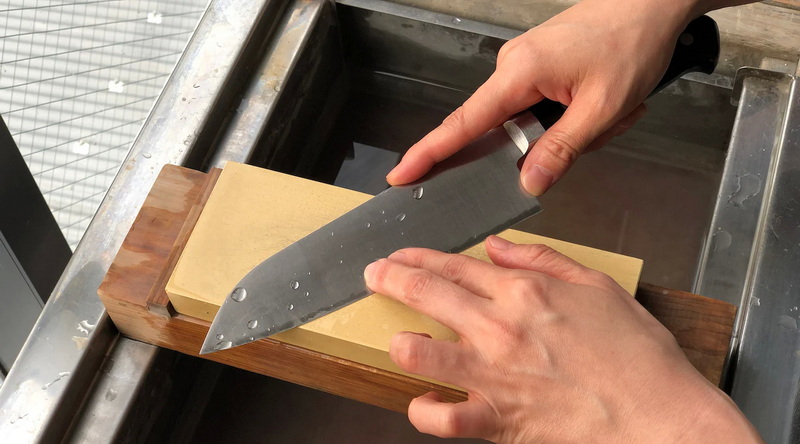
If using a water stone, soak it in water for 5 to 10 minutes until no air bubbles emerge. This ensures proper lubrication during sharpening.
Place the whetstone on a stable, non-slip surface such as a damp towel or a rubber base to prevent movement during sharpening.
The sharpening angle is critical for achieving the right balance between sharpness and blade durability. Vegetable knives typically sharpen best at an angle between 15 and 20 degrees.
To maintain this angle consistently:
- Use a sharpening guide or angle guide.
- Alternatively, stack coins under the knife spine as a visual reference.
- Keep your wrist steady and avoid rocking the blade during sharpening.
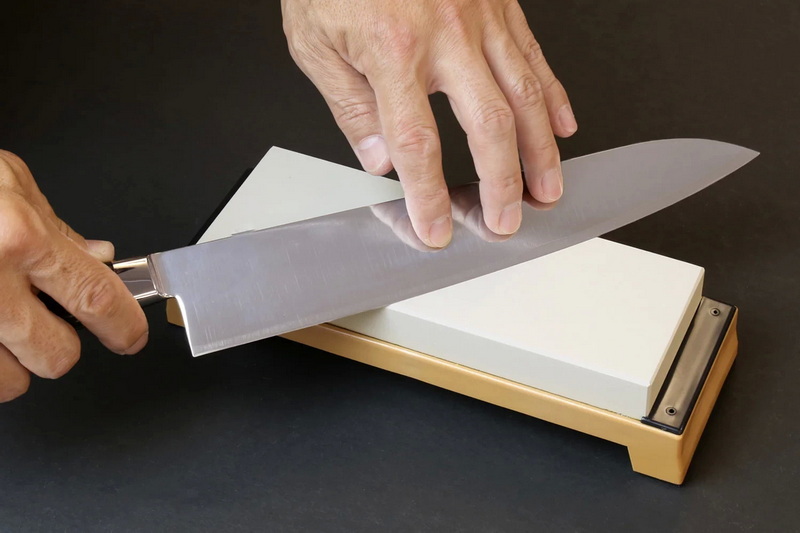
- Hold the knife firmly with your dominant hand.
- Place the blade edge against the whetstone at the correct angle.
- Using moderate pressure, slide the blade across the stone in a sweeping motion from heel to tip.
- Maintain consistent strokes, covering the entire edge evenly.
- Repeat about 10 to 15 times or until you feel a burr (a slight rough edge) on the opposite side.
- Flip the knife and repeat the same process on the other side.
- The burr should form on this side as well.
- Alternate sides to keep the edge balanced and symmetrical.
- Flip the whetstone to the fine grit side.
- Repeat the sharpening strokes on both sides with lighter pressure to polish and smooth the edge.
- This step removes any remaining burr and enhances the sharpness.
- Use a leather strop or the backside of a leather belt.
- Swipe the blade gently along the strop with light pressure to remove micro-burrs and polish the edge.
- Test by slicing through a piece of paper or gently shaving arm hair.
- A properly sharpened vegetable knife should cut effortlessly and cleanly.

Proper posture and grip improve control and safety when sharpening:
- Grip the handle firmly with your dominant hand.
- Place your index finger on the spine of the blade for stability.
- Use your other hand to guide the blade and apply pressure near the edge.
- When sharpening the front side, press the edge down toward the stone with slight forward pressure; release pressure on the return stroke.
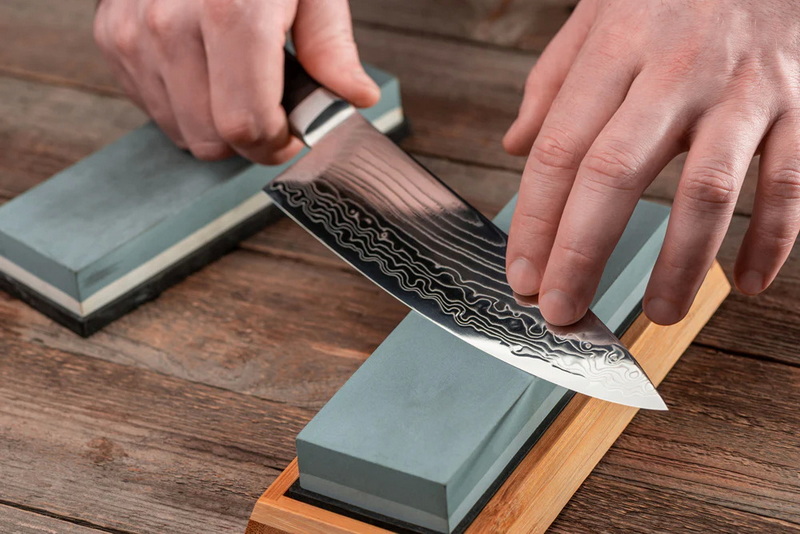
- Sharpen the blade in sections—tip, middle, and base—to ensure even sharpening.
- For the tip, slightly lift the handle and use light pressure to sharpen carefully.
- For the base, lower the handle and apply gentle pressure with your thumb to maintain edge consistency.
- Keep your wrist steady and avoid rocking the blade.
- Use coins or an angle guide for repeatable accuracy.
- Sharpen the entire length of the blade evenly: heel, belly, and tip.
- Start with medium pressure to form the edge.
- Transition to light strokes for refinement and polishing.
- Let the whetstone do the work—avoid brute force.
- The burr signals that the edge has formed.
- Feel for the burr by lightly dragging your fingertip across the edge.
- Flip the blade and sharpen the opposite side to remove the burr.
- Finish with feather-light alternating strokes and strop to polish.
As you advance, you may encounter the technique called clamshell blade sharpening. This method involves sharpening the blade with a slightly curved edge, resembling a clam shell. It combines sharpness with durability by adding supporting thickness above the edge, reducing chipping and food sticking.
After sharpening, the blade edge can be very thin and prone to chipping. Creating a secondary edge—a slightly thicker bevel just above the primary edge—adds strength and prolongs blade life. This involves sharpening at a slightly wider angle to reinforce the edge.
- Honing: Use a honing rod regularly to realign the edge and maintain sharpness.
- Cutting Surfaces: Use wooden or plastic cutting boards to protect the blade.
- Cleaning: Hand wash and dry your knife immediately after use to prevent corrosion.
- Storage: Store knives in a knife block, magnetic strip, or protective sheath to avoid dulling.
Serrated knives require a different approach:
- Use a ceramic rod or specialized serrated knife sharpener.
- Sharpen each serration individually.
- Remove burrs on the back side carefully.
- Regular sharpening prolongs the life and performance of serrated blades.
Sharpening a vegetable knife is an essential culinary skill that improves safety, efficiency, and the quality of your food preparation. By using the correct tools, maintaining a consistent sharpening angle, and following a systematic process, you can restore and maintain a razor-sharp edge on your vegetable knife. Regular honing and proper care will keep your knife in excellent condition for years. With practice, patience, and attention to detail, sharpening becomes a rewarding part of your kitchen routine.

Sharpen your vegetable knife when it starts to feel dull or requires more force to cut. For regular home use, sharpening every 3 to 6 months is typical, with honing done more frequently to maintain the edge.
Electric sharpeners are convenient but can remove too much metal and damage delicate vegetable knives. Manual sharpening with whetstones provides better control and precision.
Sharpening removes metal to create a new edge, while honing realigns the existing edge without removing material. Honing should be done regularly, and sharpening is done when the blade becomes dull.
A burr is a small, rough edge on the opposite side of the blade being sharpened. You can feel it by gently running your fingertip perpendicular to the edge. Its presence indicates that sharpening is progressing correctly.
Yes, but it requires special tools and techniques. Use a ceramic rod or serrated knife sharpener to sharpen each serration individually and remove burrs carefully.