
Views: 222 Author: Ella Publish Time: 2025-05-08 Origin: Site


Content Menu
● Common Methods to Test Chef Knife Sharpness
● Step-by-Step: Performing the Most Popular Tests
● Advanced and Scientific Sharpness Tests
>> BESS (Blade Edge Sharpness Scale) Tester
>> Magnified Visual Inspection
● Safety Tips When Testing Knife Sharpness
● How Often Should You Test Your Knife's Sharpness?
● The Role of Knife Material and Geometry
● How Professional Chefs Test Knife Sharpness
● Troubleshooting: What If Your Knife Fails the Test?
● Going Beyond: The Connection Between Sharpness and Cooking Results
● The Importance of Regular Knife Care
● Understanding When to Replace Your Knife
● FAQs: Knife Sharpness Testing
>> 1. How do I know if my chef knife is sharp enough for everyday use?
>> 2. Is the paper test reliable for all types of knives?
>> 3. How dangerous are the thumb and fingernail tests?
>> 4. Can I use food other than tomatoes to test sharpness?
>> 5. How often should I sharpen my chef knife?
A sharp chef knife is the cornerstone of efficient, safe, and enjoyable cooking. Whether you're a home cook or a professional chef, knowing how to accurately test your knife's sharpness is essential. This comprehensive guide explores multiple methods-ranging from simple visual checks to hands-on tests-so you can ensure your blade is always in peak condition.

A sharp knife is not just about precision; it's about safety and food quality. Dull knives require more force, increasing the risk of slips and injuries. Sharp blades make clean, effortless cuts, preserving the texture and appearance of ingredients and making prep work significantly easier. When your knife is sharp, you'll notice that slicing, dicing, and chopping become more fluid and less tiring, which can make cooking a more enjoyable and creative process.
Knife sharpness is determined by the fineness and consistency of the blade's edge. Over time, even the best knives lose their edge due to regular use, contact with cutting boards, and improper storage. Regular testing helps you identify when it's time to hone or sharpen your knife, preventing accidents and ensuring top performance. The microscopic structure of a knife's edge is what allows it to cut so cleanly; as the edge dulls, it develops tiny bends, chips, and imperfections that reduce its effectiveness.
Before you touch the blade, start with a visual check under a bright light. Hold the knife edge-up and slowly rotate it. A sharp edge will appear as a thin, dark line with no light reflecting off it. If you see glinting spots or shiny lines, those are dull or damaged areas that need attention. This quick check can reveal nicks or chips that might not be obvious during regular use.
This is perhaps the most popular test among chefs and home cooks. Hold a sheet of paper upright and attempt to slice through it with your knife. A sharp knife will glide through the paper effortlessly, producing a clean, straight cut. If the blade catches, tears, or fails to cut, it's time to sharpen. The paper test is a favorite because it's simple, safe, and provides immediate feedback on the blade's condition.
Tomatoes have a delicate skin and soft interior, making them an excellent indicator of sharpness. Place a tomato on a cutting board and try slicing through the skin without applying pressure. A sharp knife will penetrate and slice cleanly; a dull one will crush or tear the tomato. This test is especially useful because it mimics real-world kitchen tasks and demonstrates how a sharp knife improves food presentation.
Carefully tap the edge of the knife against your fingernail at a slight angle. If the blade “bites” or catches, it's sharp. If it slides off, it's dull. This method is quick but requires caution to avoid injury. It's a tactile way to sense the edge's condition, and many professionals rely on it for a fast check during busy prep sessions.
With extreme care, run your thumb perpendicular (never along) to the blade's edge. A sharp edge will feel slightly “grabby” or tacky, while a dull one feels smooth or rounded. This test is best for experienced users due to the risk of cuts. It's a nuanced method that can help you distinguish between a truly keen edge and one that just feels sharp.
Gently run the blade over your forearm. If it shaves hair with little effort, your knife is extremely sharp. This method is common among enthusiasts but should be done with caution. While not necessary for everyday kitchen use, it's a benchmark for those who strive for razor-like edges.
This advanced test involves holding a hair above the blade and lowering it onto the edge. If the knife is razor-sharp, it will sever the hair on contact. This is a benchmark for the sharpest possible edge and is mostly used by sharpening aficionados. It's a testament to the precision possible with careful sharpening techniques.
Other ingredients like onions, carrots, or herbs can also serve as practical tests. A sharp knife will slice cleanly through onions and carrots without crushing, and herbs will look fresh rather than bruised. Using a variety of foods for testing helps you understand how your knife performs with different textures and densities.
- Hold the knife edge-up under a bright light.
- Slowly tilt and rotate the blade.
- Look for shiny spots (dull areas) or chips.
- Hold a sheet of printer or newspaper by the edge.
- Place the heel of the knife at a 45-degree angle to the paper.
- Slice downward and diagonally.
- A clean cut means sharpness; catching or tearing means dullness.
- Place a tomato on a stable cutting surface.
- Try to slice through the skin with minimal pressure.
- Clean entry = sharp; crushing or tearing = dull.
- Hold the knife firmly.
- Gently tap the edge against your fingernail at a slight angle.
- If the blade catches, it's sharp.
- Carefully run your thumb across (not along) the blade.
- Feel for a slight grab or tackiness.

For those seeking objective measurement, the BESS tester uses a standardized method to quantify sharpness. The lower the score, the sharper the blade. This is more common in professional or enthusiast settings. The BESS system uses a calibrated filament and measures the force required for the blade to sever it, giving a precise reading of sharpness.
Using a magnifying glass or microscope, you can closely examine the edge for micro-chips, burrs, or inconsistencies. This is useful for identifying subtle imperfections that affect performance. Seeing the blade at high magnification can reveal whether your sharpening technique is producing a consistent edge or if further work is needed.
- Always cut away from your body.
- Use caution with hand-based tests (thumb, fingernail, or arm hair).
- Keep your fingers clear of the blade during all tests.
- Store knives safely after testing.
- Never rush the process; take your time to avoid accidents.
Test your knife:
- After sharpening or honing
- Before major prep sessions
- Whenever you notice increased resistance or tearing during cutting
Regular testing helps maintain a safe and efficient kitchen. If you're using your knife daily, a quick check every week can help you catch dullness before it becomes a problem.
- Hone your knife regularly with a honing rod.
- Sharpen as needed using whetstones or professional services.
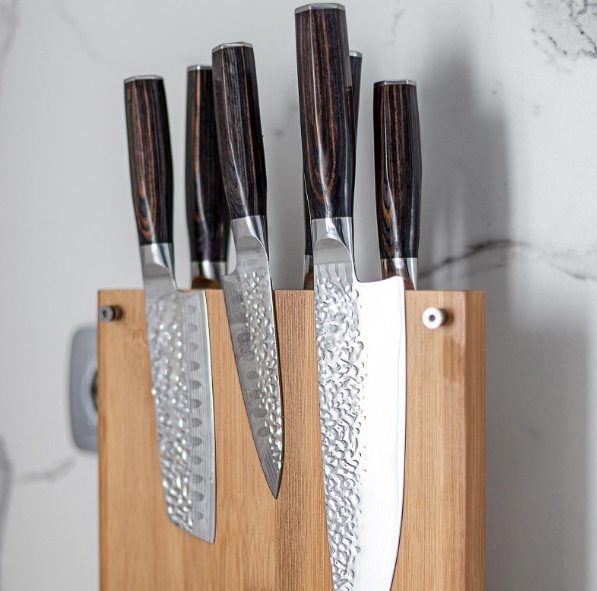
- Store knives in a block, sheath, or on a magnetic strip to protect the edge.
- Avoid cutting on hard surfaces like glass or stone.
- Clean your knife properly after each use and dry it immediately to prevent corrosion.
The sharpness and longevity of your knife's edge are influenced by the type of steel, the hardness of the blade, and the edge geometry. High-carbon steels tend to hold an edge longer but may require more maintenance to prevent rust. Stainless steels are more resistant to corrosion but may need more frequent sharpening. The angle at which the blade is sharpened also affects sharpness-a lower angle (15–20 degrees per side) produces a finer edge but may be more delicate, while a higher angle (20–25 degrees per side) is more robust but less razor-sharp.
Professional chefs often develop their own routines for testing sharpness. Many rely on the paper and tomato tests, but some also use their sense of touch and experience to judge the blade's condition. In high-volume kitchens, knives are often honed several times a day to maintain peak performance. Chefs may also use specialized tools like strops or sharpening guides to ensure consistency.
If your knife doesn't pass the sharpness tests, don't worry. Start by honing the blade with a ceramic or steel rod to realign the edge. If it's still dull, use a sharpening stone or system to restore the edge. For severely damaged blades, consider professional sharpening. Regular maintenance and proper storage will help prevent future dullness.
Sharpness doesn't just affect safety and efficiency; it also impacts the quality of your dishes. A sharp knife preserves the cell structure of fruits, vegetables, and proteins, resulting in cleaner cuts, better texture, and more attractive presentation. Delicate herbs stay vibrant and don't bruise, while meats retain their juices and shape. In baking, precise cuts can make the difference between a beautiful pastry and a crumbling mess.
Testing sharpness is only one part of knife care. Regular cleaning, drying, and proper storage are equally important. Never leave knives soaking in water, as this can damage the blade and handle. Use a soft cloth to dry your knife immediately after washing, and store it in a way that protects the edge from contact with other utensils or hard surfaces.
Even with the best care, knives have a lifespan. If your knife consistently fails sharpness tests despite sharpening, or if the blade is chipped, bent, or excessively worn, it may be time for a replacement. Investing in a high-quality chef knife and maintaining it properly can provide years of reliable service.
Testing the sharpness of your chef knife is a vital kitchen skill that ensures safety, efficiency, and culinary precision. By mastering a variety of methods-from visual inspection to the classic paper and tomato tests-you can keep your blades in top condition and elevate your cooking experience. Remember, a sharp knife is a safe knife. Regular testing and proper maintenance will make every meal prep smoother and more enjoyable. Investing time in learning these techniques pays off with better results, greater confidence, and a more rewarding time in the kitchen.

A chef knife is sufficiently sharp if it slices cleanly through paper and glides through tomatoes or onions without crushing. For most home cooks, passing the paper and tomato tests is adequate for daily prep.
The paper test works well for most straight-edged knives, but may not be suitable for serrated blades or cleavers. For those, try slicing soft produce or performing a visual inspection.
Both tests carry some risk. Always move your finger across (not along) the blade, use minimal pressure, and proceed with caution. If you're unsure, stick to the paper or tomato tests.
Yes! Onions, carrots, potatoes, and herbs are also good indicators. A sharp knife will slice through these with minimal resistance, producing clean cuts and reducing bruising.
Frequency depends on usage, cutting surface, and knife quality. For regular home use, sharpening every few months and honing weekly is a good rule of thumb. Always test sharpness before major prep sessions.